
### Introduction
If you’ve ever wondered how to go about collecting your own malware samples without relying on public repositories like [VX-Underground](https://github.com/vxunderground), then this is the article for you.
We will go over the basics of building a simple, yet effective hive of honeypots so that we can get our hands on some samples.
### What is a Honeypot?
Generally speaking, a honeypot can be a person or thing set up as a decoy that aims to appear enticing (hence the name) in order to trap an individual. In the cyber security industry, and in the context I’ll be discussing, honeypots function similarly by appealing to hackers and cyber criminals. This allows researchers like you and I to study them and learn more about their operations.
While valuable to researchers, it is also common to see honeypots positioned inside corporate networks. The main idea is to alert the defenders of the booby-trapped network if an intruder stumbles upon the honeypot while pillaging. The important thing to remember is that in no way are honeypots supposed to act similar to an IPS or a deterrent of some kind, their purpose is to confuse intruders and cause them to spend more time looking for loot which ideally leads to them slipping up and revealing their presence.
Another thing to consider is that honeypots may inadvertently serve as an entry point into somebody’s network. Therefore, it is vital that they are well secured and appropriately configured.
### T-Pot
I will be using [T-Pot](https://github.com/telekom-security/tpotce) which is an all-in-one do it all type of deal. It handles most of the dirty work for us so which means that we can focus on the threats. While there are other options out there for honeypots, T-Pot stands out by providing us with everything we need without too much hassle. It comes packed with 20+ honeypots (we will discover shortly that Cowrie pulls in a *boat load* of traffic) and offers a number of pretty visualisation options using the Elastic Stack, including an animated attack map (I’m embarrassed to admit, I was very excited about this feature) that displays live information and lots of additional security tools to further improve our hunting capabilities.
Overall, T-Pot’s documentation on their GitHub is extensive and should be highly referenced during the installation process. I will try to cover any potential issues that may arise but consider consulting the documentation or drop a comment down below and I can do my best to help.
### The Hosting Infrastructure
To begin with, we just need somewhere to host T-Pot on. For this guide I chose to use [DigitalOcean](https://www.digitalocean.com/) as my hosting provider but there are many other options out there such as AWS, Google Cloud, and so on.
If you’re reading this post around January 2024, DigitalOcean should still offer a $200 credit bonus when you sign up! This is enough to run our honeypot for _at least_ 2 months.
> [!warning] Alert
The following steps apply only if you are using [DigitalOcean](https://www.digitalocean.com/). Other cloud providers vary.
### Buying a Droplet
1. Create an account with [DigitalOcean](https://www.digitalocean.com/).
2. Sign in to your new account. If applicable, check your account balance to confirm the $200 credit.
3. Navigate to **Projects** on the left-hand side and create a new project.
4. Fill the boxes in to suit your needs.
5. Spin ‘er up baby!
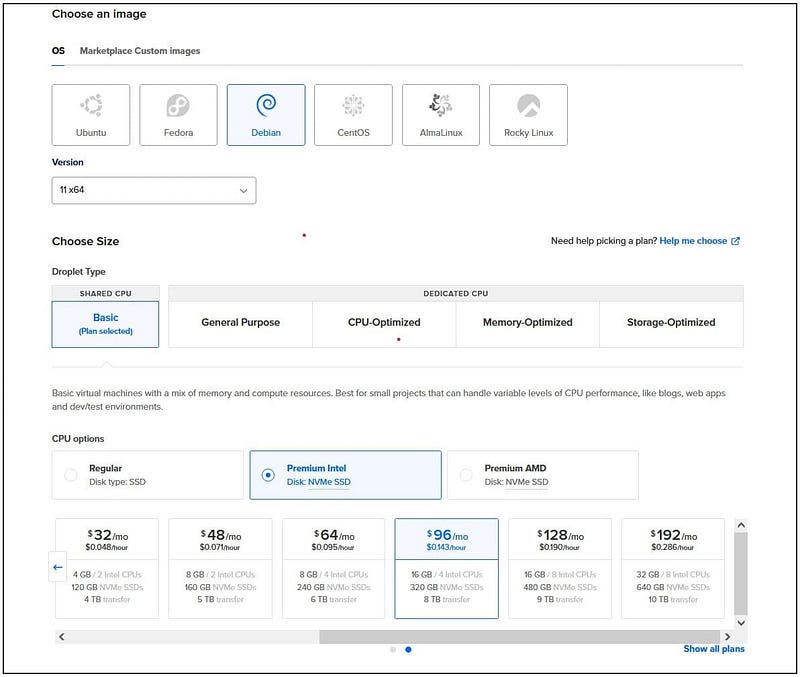
6. Now this is where we get to choose what resources we want the droplet to have. T-Pot’s [documentation](https://github.com/telekom-security/tpotce) recommends that we have at _least_ 8GB of RAM and over 128 GB of storage. Now through a little trial and error I came to the conclusion that 8GB is not enough and system crashes may occur. I went for 16GB to be safe and it runs buttery smooth.
7. Choose a **Debian** build on version **11 x64** as the OS. I advise against using any other OS because they haven’t been tested.
8. Finally, I went for a Premium Intel CPU with a NVMe SSD.
9. In total this comes to a whopping $96/mo but don’t forget about the free credit!
> [!tip]
For research purposes, 2 months is plenty of time to experiment and build statistics.
After selecting our specs, DigitalOcean will do some magic in the background while it prepares eveything for us. This doesn’t take long, and in a minute or two, we should see an IP address. Easy, right?
### Connecting to the Droplet
It’s dealer’s choice here really… You can either SSH on:
```shell
ssh root@<ip> -p 64295
```
> [!warning]
Take note that we’re connecting to port 64295, not port 22.
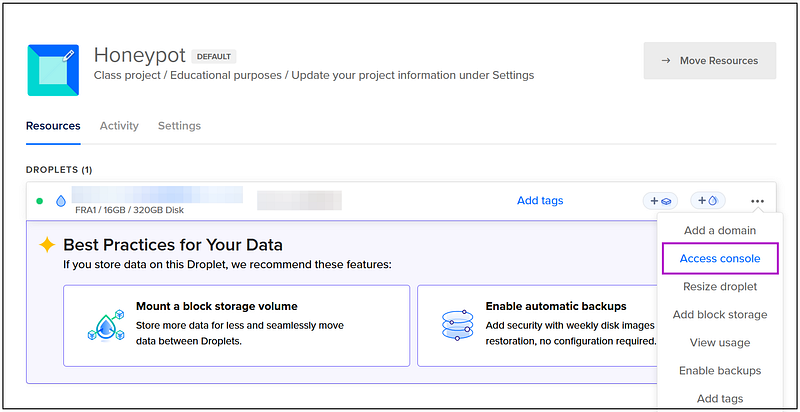
Or we can use the `Droplet Console` which allows us to interact with the server via our browser.
### Installing T-Pot
Once you’ve landed in your terminal. Execute the following commands:
```shell
apt-get -y update && apt-get -y install git
git clone https://github.com/telekom-security/tpotce
cd tpotce/iso/installer
./install.sh --type =user
```
A prompt will pop-up displaying which ports are currently in use on our Droplet. Check this to eliminate any ports conflicting with T-Pot. If this is a fresh install, you shouldn’t have any problems.

Choose the edition of T-Pot that you want to install. I went for **STANDARD** as it comes with everything you can want. But choose so according to your needs.

Next, we will get prompted for a username, select **no** for the first box and then we’re able to create a username and password.
> [!tip]
Please take note of this username (whoops). It will be required for logging into our web tools like Canopy, Elastic, etc.
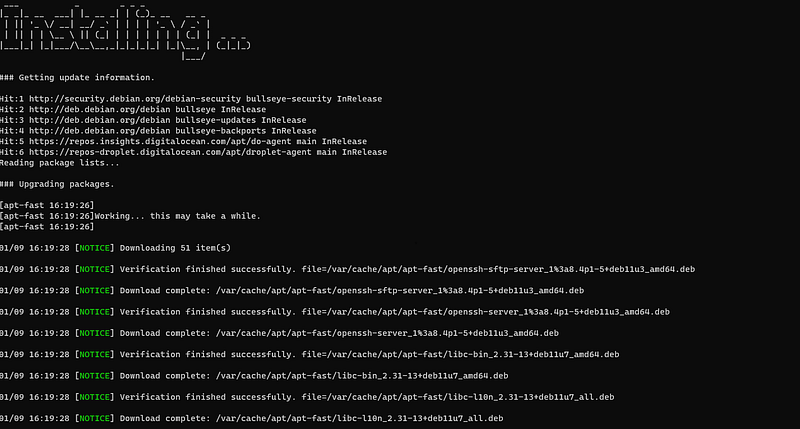
Enjoy the pretty ASCII art and let it do it’s thing. The install takes _around_ 10–15 minutes and will automatically reboot after installation so now is a good time to grab a cup of coffee and stretch the legs.
### Post Installation?
T-Pot is absolutely fantastic as it handles pretty much all of the setup.
If you followed my steps we just need to create a user account for logging into **Cockpit**:
```shell
add user <username>
```
Add this user to the `sudo` group:
```shell
usermod -aG sudo <username>
```
In your browser of choice, navigate to the web dashboard:
```shell
https://<ip>:64297/
```
> [!info]
Often referred to as Elasticsearch, the ELK stack gives you the ability to aggregate logs from all your systems and applications, analyse these logs, and create visualizations for application and infrastructure monitoring, faster troubleshooting, security analytics, and more.
What you do now is entirely up to you! Have a play around with the ELK stack and try out Kibana — this is where we can see a simple yet comprehensive visualisation of the statistics gathered by our new army of honeypots.
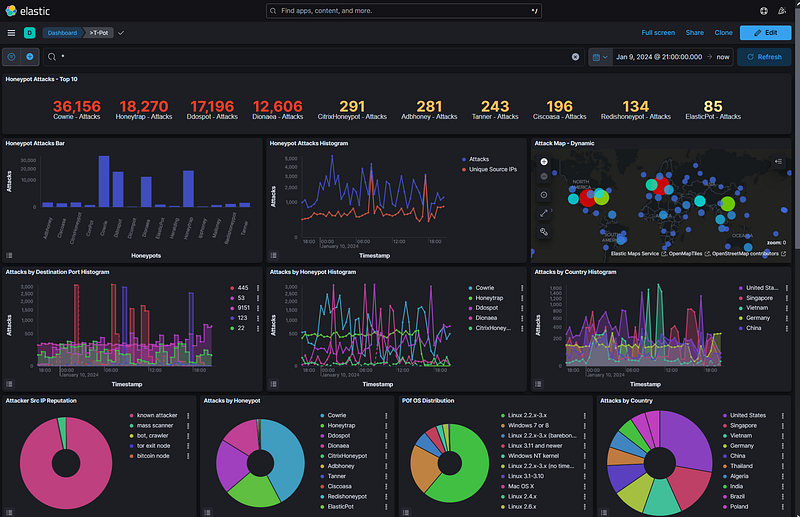
As you can see from the image above, I had my honeypots up for around 24 hours by the time I had written this post. I’ll let the numbers speak for themselves.
### Hunting Season
The traps are primed and covered in honey, so now all we have to do is sit back, relax, and let the traffic roll in! I only wanted to cover the initial install/setup of T-Pot in this post as what you do with your honeypot is entirely up to you.
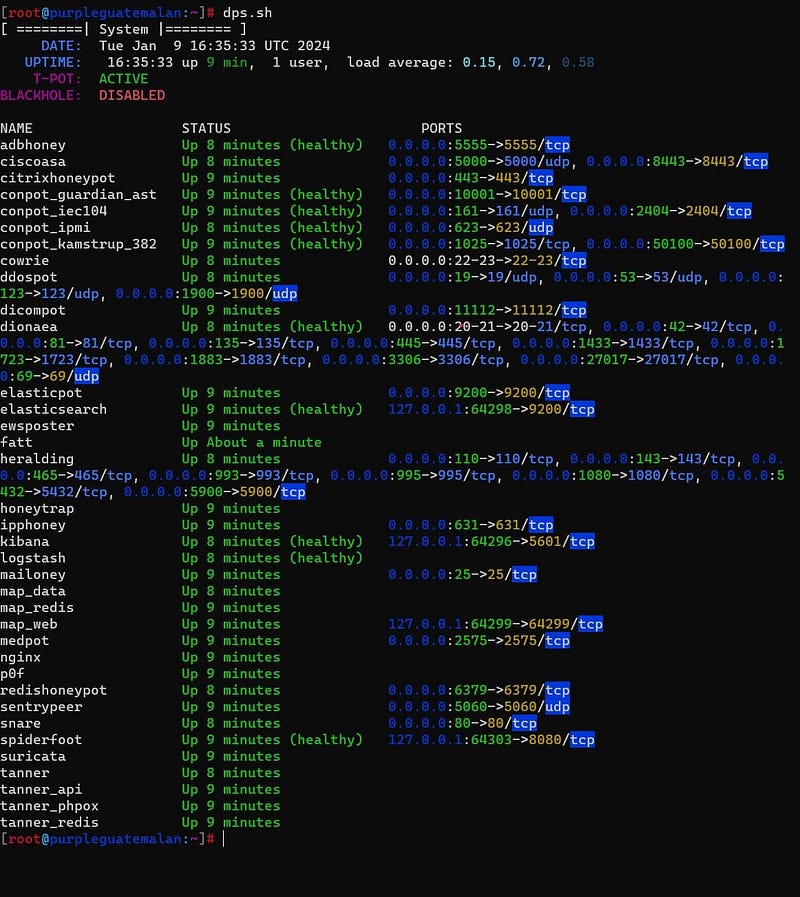
Before we finish up, I want to leave you with some simple commands for monitoring your Droplet:
```
dps.sh
```
```
sudo apt install htop
htop
```
Images that show the output of these commands respectively:

> [!tip]
Log files are located in `/data` (dropped binaries will be stored in the relative folders).
### Conclusion
Thank you for reading, peace.